


DIY HANDMADE FACE MASK by using cloth bag (Best out of waste)
Masks have become a hot commodity, as the coronavirus is spreading worldwide. These essential items are now flying off store shelves. Hospitals’ demand for these commodities has increased comparatively. Now as the cases are increasing day by day we need more masks and it’s not easy to manufacture them fast. We are running short of masks so in this case let’s try to make a homemade mask, something is better than nothing.
Masks are generally used to protect ourselves and others from respiratory droplets, and with a rising number of asymptomatic COVID-19 cases, there’s no harm in wearing homemade masks at least, while going out and about as long as it is a homemade mask.
A homemade mask must cover the nose and mouth since this is where respiratory droplets enter and exit. As for fabric recommendations, cotton is advisable, the thicker the better, make it 3 layers and tie it tightly.
” The thicker and more tightly woven material is, more protective. Always make 2 to 3 masks so that when one mask is sanitized others can be used. It should be sanitized after each use.
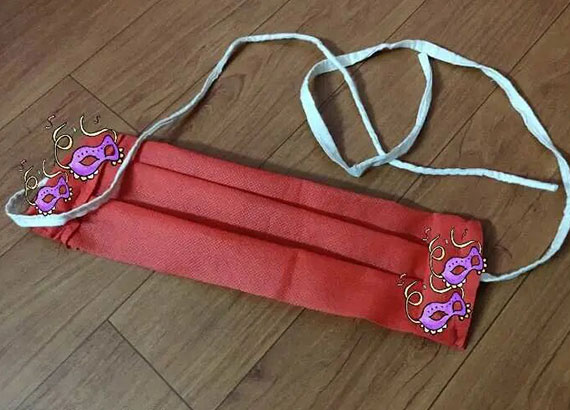
I have made masks from cloth bags, best out of waste indeed.
Making DIY face mask at home from a cloth bag.
Material Required
- Cloth bag
- Scissors
- Needle and thread
- Sewing machine (if you have one)
- Two strips
- Ruler
- Fabric or cloth bag
Make your own face mask—no sewing machine
- Cloth bags can do more than carrying groceries—they can also be turned to make face masks and can be used during this crucial phase.
- Cloth masks can be used as an alternative to medical masks.
How to make a face mask
Time: 90 minutes if sewn by hand
Materials need to be ready before make ting :
- 1 medium non-woven polypropylene reusable grocery bag
- 2 strings /60 inches of ribbon, between ½ inch wide
Method
1. Wash the reusable grocery cloth bag.
2. Cut the sides off the grocery bag, cut off the handles.
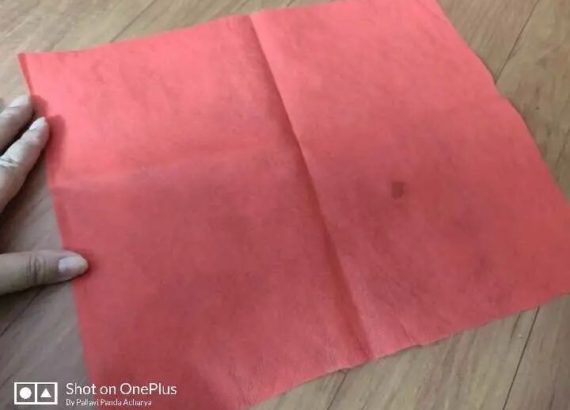
3. Cut the bag into sheets.
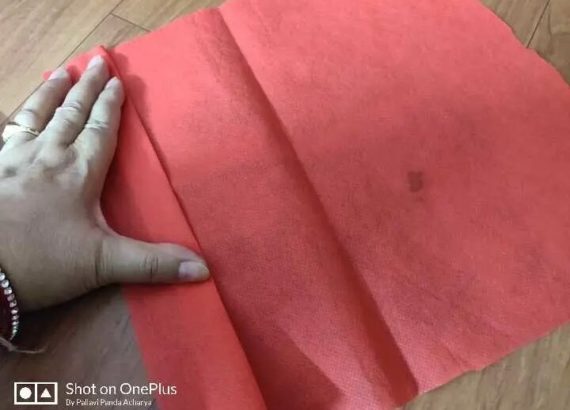
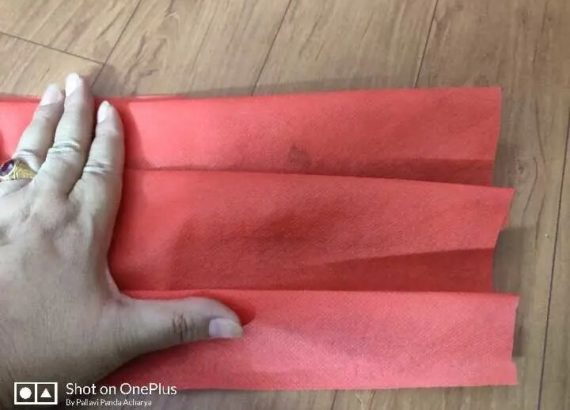
4. Measure and cut one sheet, measure the down 9 inches and draw parallel vertical cutting lines. Fold them, iron them. Stitch these by sewing both sides a quarter-inch in from the edge. Double back your stitch to make sure the pleat seam is strong.
6. Fold half an inch of material from opposite edges. Iron the fold on low heat to set it. Then, sew it a quarter inch from the edge.
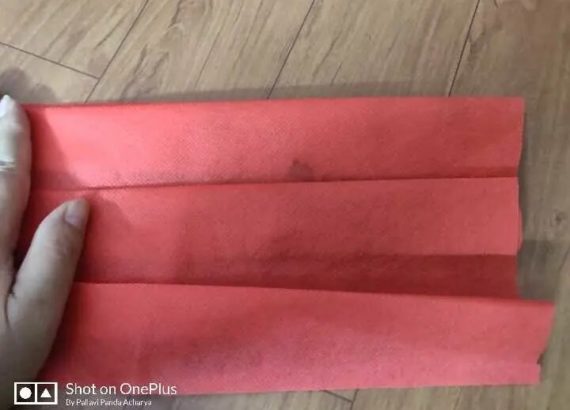
Caution: High heat will melt the bag material.
Set each fold with an iron. Be aware of the temperature.
7. Make the head tie cut two strips or ribbons, make sure the ribbons/strips are long enough to reach the back of your head with at least 4 inches to spare. If the length of the ribbons is right, sew the pieces at both edges.
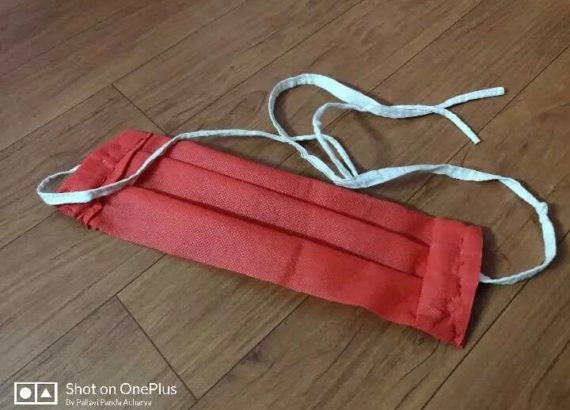
8. Sterilize your mask. Before using it for the first time, submerge your mask in boiling water for 10 minutes.
It’s important to remember a face mask by itself is not enough. wear glasses or goggles to protect your eyes, and never touch the part that covers your mouth. When you’re done using it, sterilize it, let it dry completely (in the sun if you have access) to stave off any bacteria growth, and then store the mask in a clean, plastic, resealable container.
Help yourself and your community. You can make masks and donate to workers you come across or help people who are in need.
In a time of mask shortages, it’s a “better than nothing” precaution if you need to move through a crowded space or take care of someone who is sick. Please follow instructions from your local authorities and remember that social distancing, washing our hands thoroughly, and staying home are still the best ways to protect yourself and your family from COVID-19.
#stay safe.